


If you've just picked up your first dry herb vaporizer—or you're still deciding whether to make the switch—you're in the right place. Vaping dry herbs can feel a little intimidating at first, but the learning curve is shorter than most people expect. Once you understand a few basics, you'll wonder why you didn't switch sooner.
At its core, a dry herb vaporizer warms your material just enough to release its active compounds as vapor, without ever setting it on fire. That single difference—heating instead of burning—is what makes vaping cleaner, more flavorful, and more efficient than lighting up. In this guide, we'll cover how these devices work, the different types you'll come across, and a simple step-by-step routine to get you vaping like a pro. Ready to shop while you read? Browse our full lineup of dry herb vaporizers.
Quick Start: The Short Version
If you just want the essentials, here's the whole process in six steps:
- Grind your herb to a medium consistency.
- Pack the chamber—firm for conduction vapes, loose for convection.
- Power on and let it reach temperature.
- Set your temp somewhere around 375–390°F (190–199°C) to start.
- Draw slowly and steadily for about 7–10 seconds per pull.
- Brush out the chamber while it's still warm before you put it away.
That's genuinely it. Everything below is just detail to help you dial things in.
How a Dry Herb Vaporizer Actually Works
Think of a dry herb vaporizer as a precision heater. You load ground herb into a heating chamber (sometimes called the oven or bowl), the device warms it to a set temperature, and you inhale the vapor that comes off.
The key is that the temperature stays below the point of combustion. When you burn plant material with a flame, you create smoke—along with tar, ash, and other byproducts you'd rather not breathe in. A vaporizer keeps the heat in a controlled window, so the compounds you actually want turn into vapor while the harsh stuff stays behind. You're getting the good without the burn.
Most modern vapes run on a rechargeable battery, though a few flameless and butane-powered models exist for people who never want to worry about charging. This guide focuses on the electronic kind, since that's what most beginners start with.
Is Vaping Dry Herbs Safe?
Used correctly, dry herb vaping is widely considered a cleaner alternative to smoking. The whole point is avoiding combustion, which is where most of the harmful byproducts of smoking come from. As long as you keep your temperatures in a reasonable range—generally under about 446°F (230°C)—you're vaporizing rather than scorching your material.
We're not making medical claims here, and everyone's situation is different. But the basic logic is straightforward: less burning means fewer combustion byproducts.
Why People Make the Switch
A few benefits tend to win people over:
- Cleaner flavor. Smoke tends to flatten everything into one harsh, burnt note. Vapor lets the natural flavor and aroma of your herb come through, especially at lower temperatures.
- Easier on the throat. Without smoke, draws feel noticeably smoother and less raspy.
- More discreet. Vapor is lighter than smoke and tends to fade within a couple of minutes instead of clinging to everything for hours.
- Better efficiency. Because vaporizing extracts more from each load, most people find they use noticeably less material than they did when smoking.
- Portability. Plenty of vapes are pocket-sized, so you can take a quick session and tuck the device away when you're done.
The Trade-Offs
To keep it balanced, vaping does come with a few downsides worth knowing about:
- A quality vaporizer costs more upfront than a lighter and a pipe.
- There's a small learning curve while you figure out grind, packing, and temperature.
- Devices need regular cleaning to keep performing and tasting their best.
For most people, those are minor compared to the upside—and the efficiency savings tend to offset the initial cost within a few months.
Types of Dry Herb Vaporizers
Broadly, vapes fall into two camps based on how you use them, and three camps based on how they heat.
Portable vs. Desktop
Portable vaporizers run on a built-in battery and are designed to go wherever you do. They're the most popular choice for beginners thanks to their convenience and lower price point. Great examples in our lineup include the budget-friendly Randy's Echo, the mid-range AUXO Calent, and premium options like the DaVinci IQ2 and Storz & Bickel Mighty+. The trade-off is that you'll need to recharge them.
Desktop vaporizers plug into the wall and are built for longer, more powerful sessions at home. They typically offer the best vapor quality and can easily serve a group—think of the legendary Storz & Bickel Volcano Classic or the Plenty. They're larger and pricier, but hard to beat for pure performance.
Heating Methods
How a vape heats your material affects flavor, vapor density, and ease of use.
- Conduction heats your herb through direct contact with a hot surface, like a tiny oven. These vapes are usually more affordable and beginner-friendly, though flavor can fade a bit faster since the material keeps cooking between draws.
- Convection heats the air that passes through your herb only as you inhale. This method delivers the cleanest flavor and excellent efficiency, but tends to cost more and can drain a battery faster.
- Hybrid vapes combine both approaches. Most newer devices fall here because they offer a nice balance of flavor, efficiency, and simplicity.
How to Vape Dry Herbs, Step by Step
Here's a reliable routine that works with just about any device.
Step 1: Grind Your Herb
A good grind is the foundation of a good session. Grinding increases surface area, which means more even heating and better vapor. As a rule of thumb, conduction vapes do well with a finer grind, convection vapes prefer something coarser, and a medium grind is a safe bet if you're unsure.
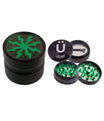
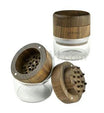
A decent grinder makes a real difference in consistency. A four-piece model with a kief catcher like the Ooze Saturn Globe 4pc Grinder or the RYOT GR8TR is well worth it. Browse all of our grinders to find your fit.
Step 2: Pack the Chamber
How you load depends on your heating style:
- Conduction vapes like a firm, fairly full pack so the herb makes good contact with the heated surface.
- Convection and hybrid vapes prefer a looser fill—mound it gently and press lightly so air can flow through.
The goal is balanced airflow. Pack too tight in a convection vape and you'll choke the draw; pack too loose in a conduction vape and it won't heat evenly.
Step 3: Power It On
Most vapes turn on with five quick presses of the power button, though some use a triple-press or a long hold. Check your device's manual if you're not sure. Once it's on, it'll either heat to a preset temperature or wait for you to choose one. Heat-up time ranges from around 15 seconds to a minute depending on the model.
Step 4: Choose Your Temperature
Temperature is where you really shape your experience. Here's a general roadmap:
- Low (around 350–375°F / 177–190°C): The flavor zone. Vapor is light and wispy but tastes fantastic, with gentle effects. A great place to start.
- Medium (around 375–390°F / 190–199°C): The balanced sweet spot. Thicker vapor with plenty of flavor and a bit more punch. This is where most people end up living.
- High (around 390–430°F / 199–221°C): The cloud zone. Flavor drops off, but vapor gets dense and effects come on stronger.
A good tip: start lower than you think you need. You can always take another draw or bump the temperature up, but you can't undo an over-roasted bowl. Try to avoid going much past 430°F (221°C), where you start creeping toward combustion.
Step 5: Take Your Draw
Once it's up to temperature, inhale slowly and steadily through the mouthpiece for about 7–10 seconds, then exhale. Resist the urge to rip it hard like a cigarette—gentle, patient draws produce far better vapor. Your first couple of pulls will be light and flavorful, and vapor will build as the session goes on.
If you're not getting much vapor at first, slow down and extend your draw. A lot of beginners simply don't inhale long enough.
Step 6: Power Off and Clean Up
When you're done, switch the device off and let it cool for a minute. If your herb is fully spent (it'll look evenly brown), brush out the chamber while it's still warm—this keeps residue from baking on and extends the time between deep cleans.
For a deep clean every couple of weeks or so, soak the removable parts in isopropyl alcohol and wipe everything down. Which pieces can be soaked varies by model, so always double-check your manual first. Stock up on cleaning supplies and replacement parts in our essentials & accessories collection.
Troubleshooting Common Beginner Problems
No vapor? Your temperature may be too low, the device might not be fully heated yet, you may not be drawing long enough, or the chamber might be packed wrong for your heating type. Work through those one at a time.
Tastes burnt or harsh? Lower your temperature by 10–15 degrees, check whether the chamber needs cleaning, or confirm your herb isn't already spent (dark brown means it's done).
Not feeling much? Vapor can affect you more gradually than smoke—give it 5 to 10 minutes. You can also try a slightly higher temperature, longer draws, or better-quality material.
A Few Final Tips
- Know the rules where you are. A safe default: if you can't smoke somewhere, assume you can't vape there either.
- Material quality matters. Even the best vaporizer can't fix low-grade herb. Store yours in an airtight container somewhere cool and dark.
- Start low, go slow. Begin at lower temperatures and work your way up as you learn what you like.
- Experiment. Over time you'll develop your own preferences for grind, pack, and temperature.
Frequently Asked Questions
How much herb should I load?
Fill the chamber based on your heating type—firm for conduction, loose for convection—and avoid leaving big empty gaps. Most portable ovens hold somewhere around 0.1–0.3 grams.
How long does a session last?
Usually 5–15 minutes, depending on the device and temperature. You'll know you're done when vapor thins out or the taste turns unpleasant.
Can I reuse my herb?
If it's not fully spent (still light to medium brown), yes. Just power down and come back to it later.
How often should I clean it?
Brush out the chamber after each session, and do a full clean every 10–15 sessions or whenever performance and flavor start to dip.
Can I use oils or concentrates in a dry herb vape?
No. Dry herb vapes are built specifically for dried plant material. Oils and e-liquids can damage the device.
Why does my vape still have a smell if it's not burning?
Vapor carries a light scent, but it's far milder than smoke and clears quickly. A strong smell can mean you're running too hot and edging toward combustion—keep it under about 430°F (221°C).
Ready to gear up? Browse our full range of dry herb vaporizers, grinders, and accessories at TPC Supply Co. Have a question we didn't cover? Reach out—we're always happy to help you get the most out of your setup.
Must be 21+ to purchase. Products are intended for use with legal herbal blends only.
Leave a comment
This site is protected by hCaptcha and the hCaptcha Privacy Policy and Terms of Service apply.